Suppose messaging with someone delightfully on GBWhatsApp Pro and suddenly getting stuck with a number to save in contacts. Don’t get worried, as we found three amazing techniques that you can deploy on your GBWhatsApp Pro to save contacts directly to your contact list.
Method 1: Using GBWhatsApp Pro Interface’s “New Contact” Button
Let’s get initialized with the most convenient procedure of adding a contact to the phonebook.
- Open the already installed GBWhatsApp Pro app on your smartphone.
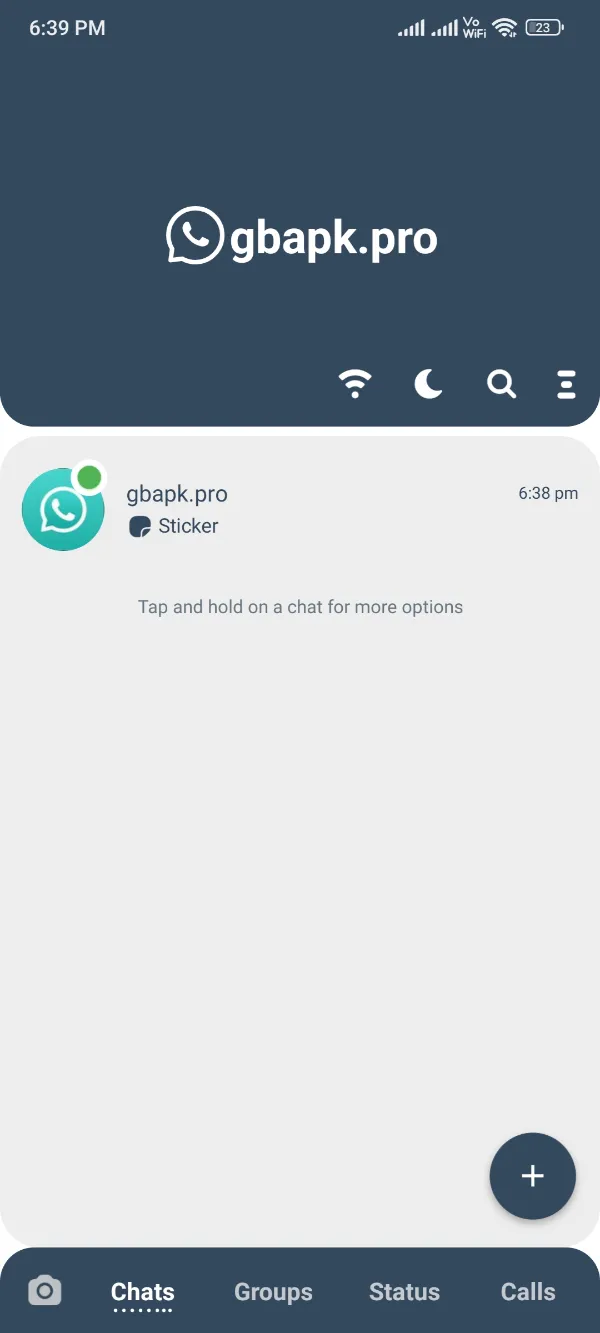
- Glance and hit the (+) icon positioned on the bottom right corner of the homepage.
- Tap the topmost Message icon from the presented “+ Menu”.
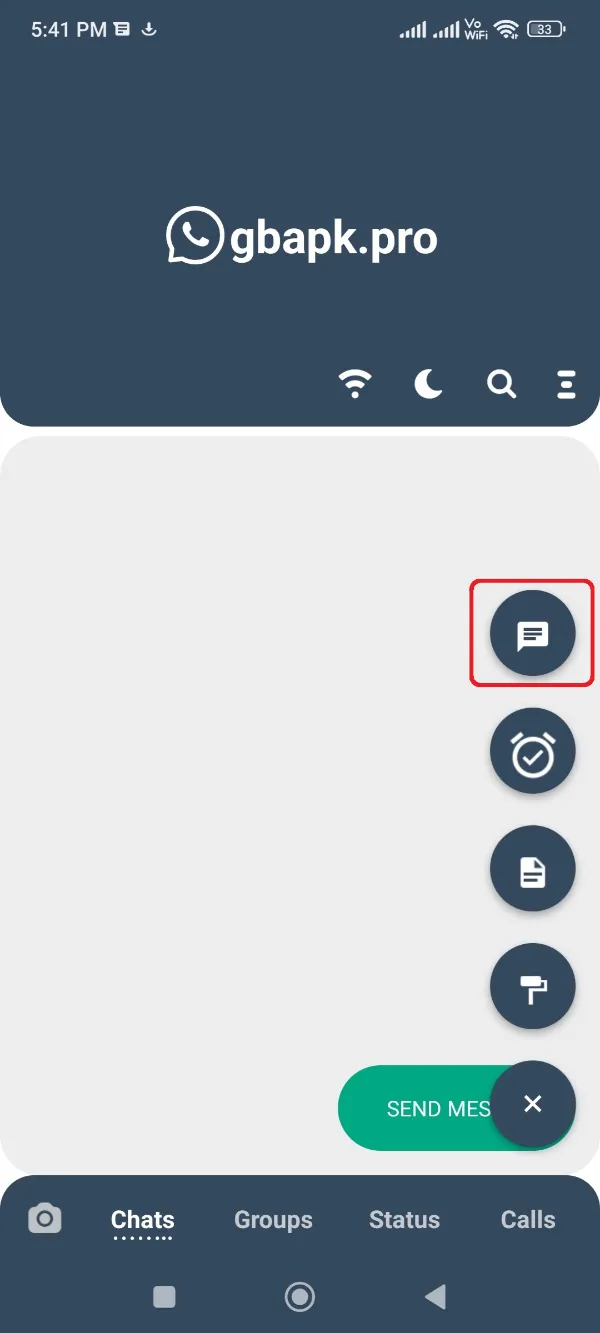
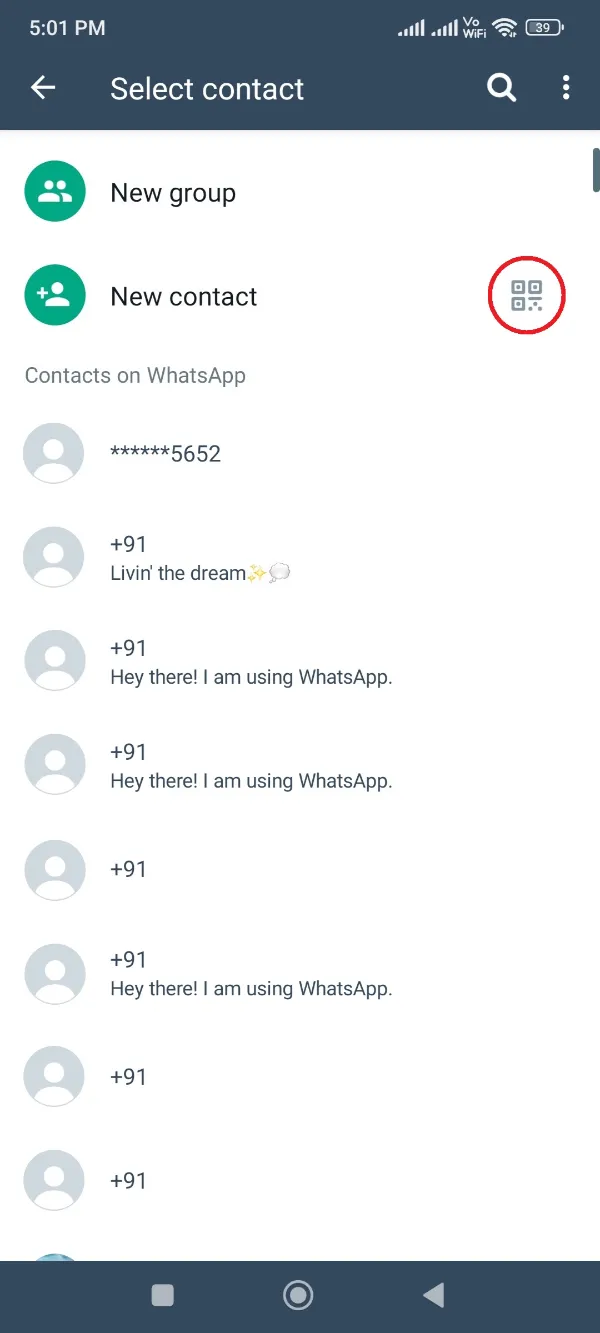
- Click the secondly positioned New Contact button.
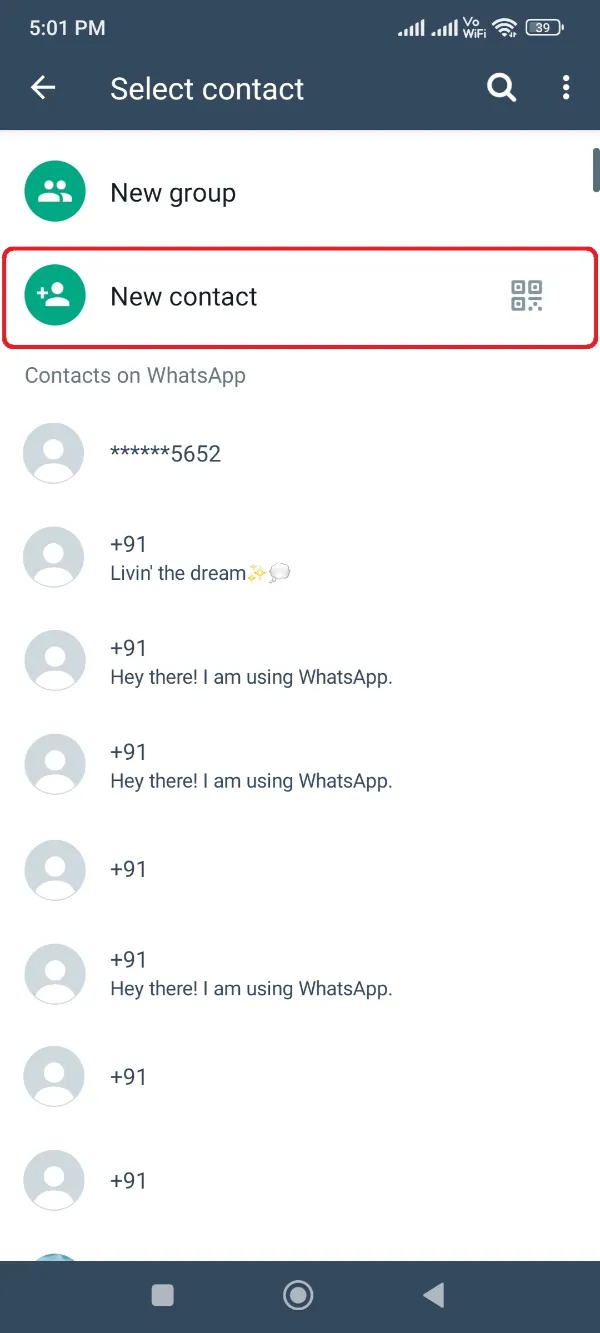
- You’d get redirected to the Contacts app. Fill in the Mobile Number, name, and any other optional data.
- After filling in that, instantly click the Save button.
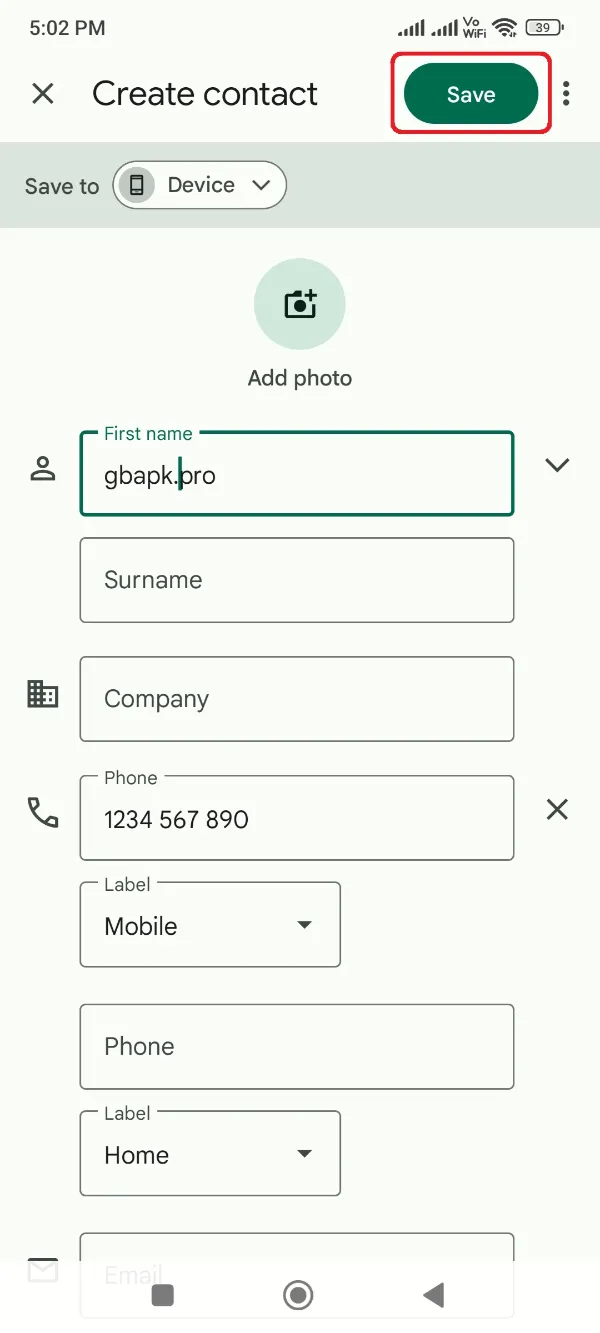
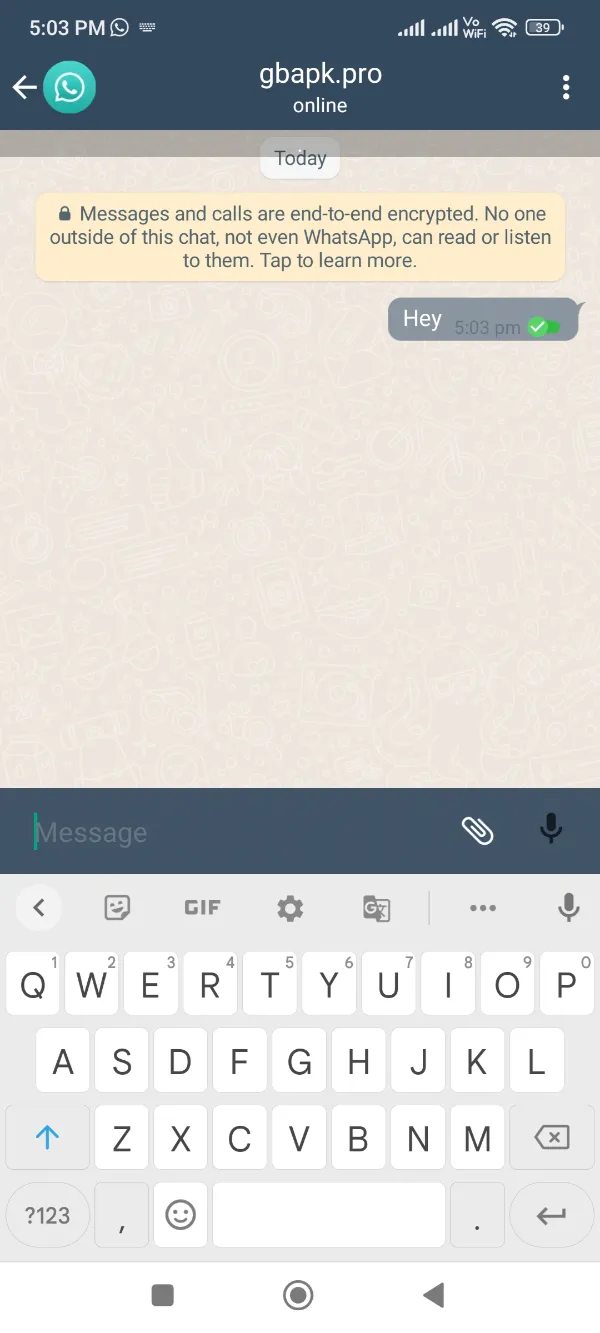
- Finally, you’d get redirected back to GBWhatsApp Pro interface and can now continue your chatting.
Smart Tip: These days, enormous businesses, shops, and entrepreneurs are using WhatsApp QRs at their stores and places. If you want to go real quick while having access to their WhatsApp QR, just press the Scan icon in front of the above 4th step’s New Contact button. This would instantly fill in all the details about that contact to your phone book, and you just need to click the Save button lastly.
Method 2: Using Contacts Button on Messaging Interface
The next method is also handier and goes a little the same as that of the last New Contact button procedure. Here, you need to follow the below steps.
- Open GBWhatsApp Pro app on your Android device.

- Click the (+) icon listed in the bottom-right corner.
- Hit and open that Messages icon from the (+) menu.

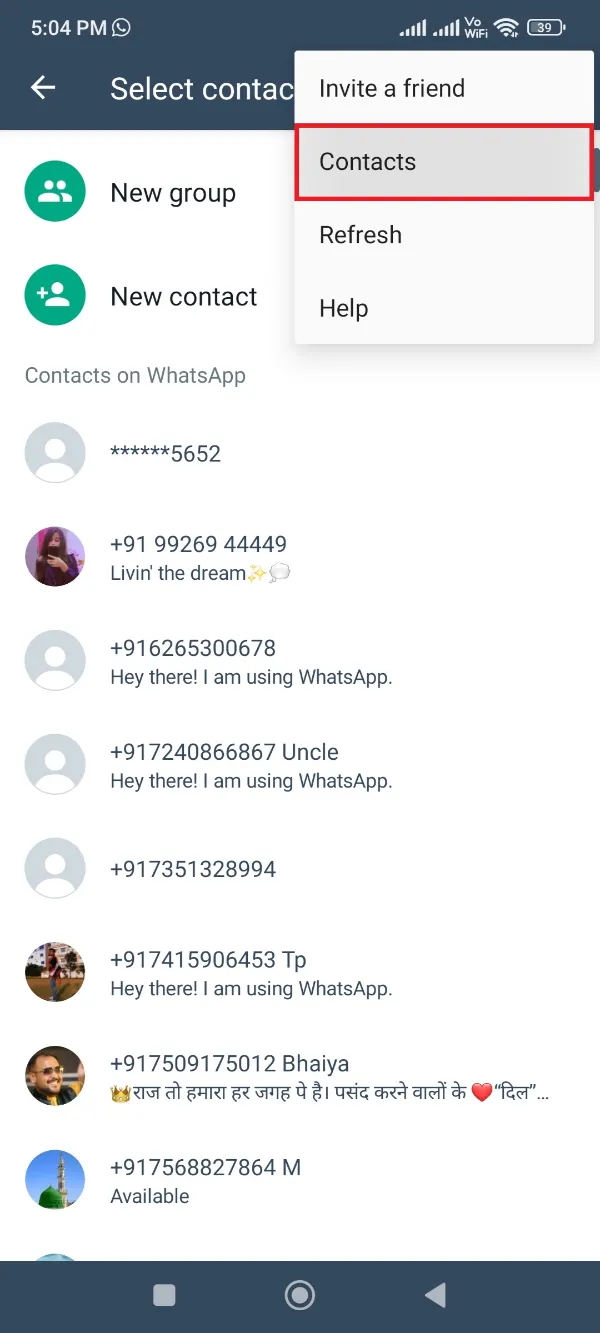
- Presently, touch the top-right cornered three-dot button.
- Finally, press the Contacts button as shown in the below picture.
- Fill in all the important details, including the number, name, and all details you think are important.

- Click the Save button to save contacts as well as get back to your adored GBWhatsApp Pro interface.
Method 3: Saving New Contact from WhatsApp Message
The last method to save numbers in the phone book while being on GBWhatsApp Pro’s interface will only work when someone will message you that WhatsApp number in contact format. It looks like the below screenshot.
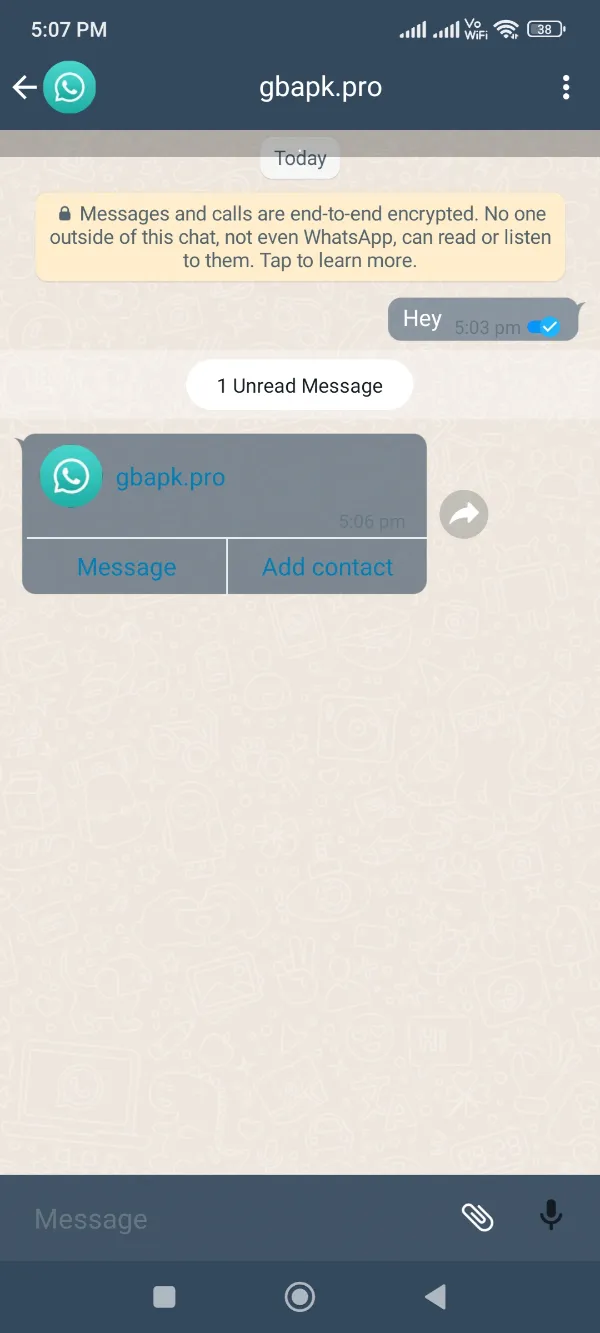
If that’s the exact instance you got, you can follow the below procedure for saving that contact to your phone book instantaneously.
- Open the GBWhatsApp Pro.

- Get to that message you got with a contact.

- Under the name of the user, click the right one, Add Contact button.
- Choose among the type of contact. (If you’re saving a new number of your phonebook’s existing contact, choose Existing option. Besides, choose New for a completely new contact.)
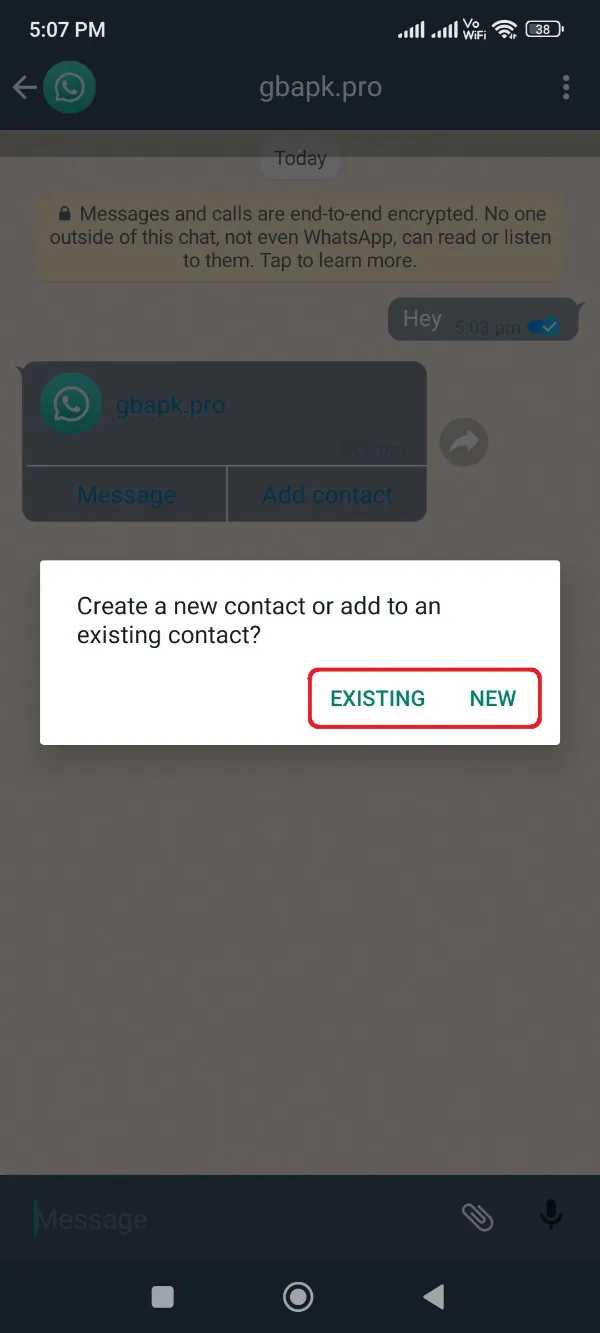
- Now, you’d see a contact adding request already filled with the name you got with that contact and number.
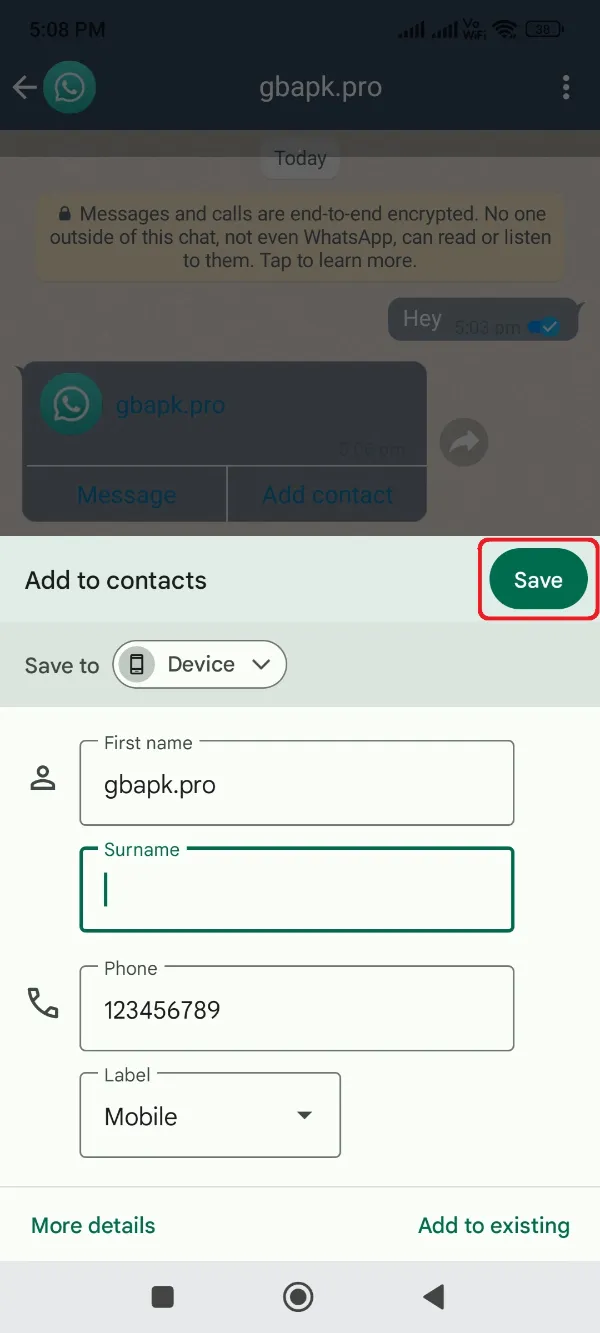
- If you want any changes to that name, rename it, or otherwise click the Save button.
Now, you’d see that contact listed on your contact list to message them through GBWhatsApp Pro, call them, or text message them. Use that contact as it suits you!
Smart Trick
If you’re in hurry to send a message to someone on the GBWhatsApp Pro app interface and got annoyed by adding a new number every time before messaging them, you can also use this smart trick.
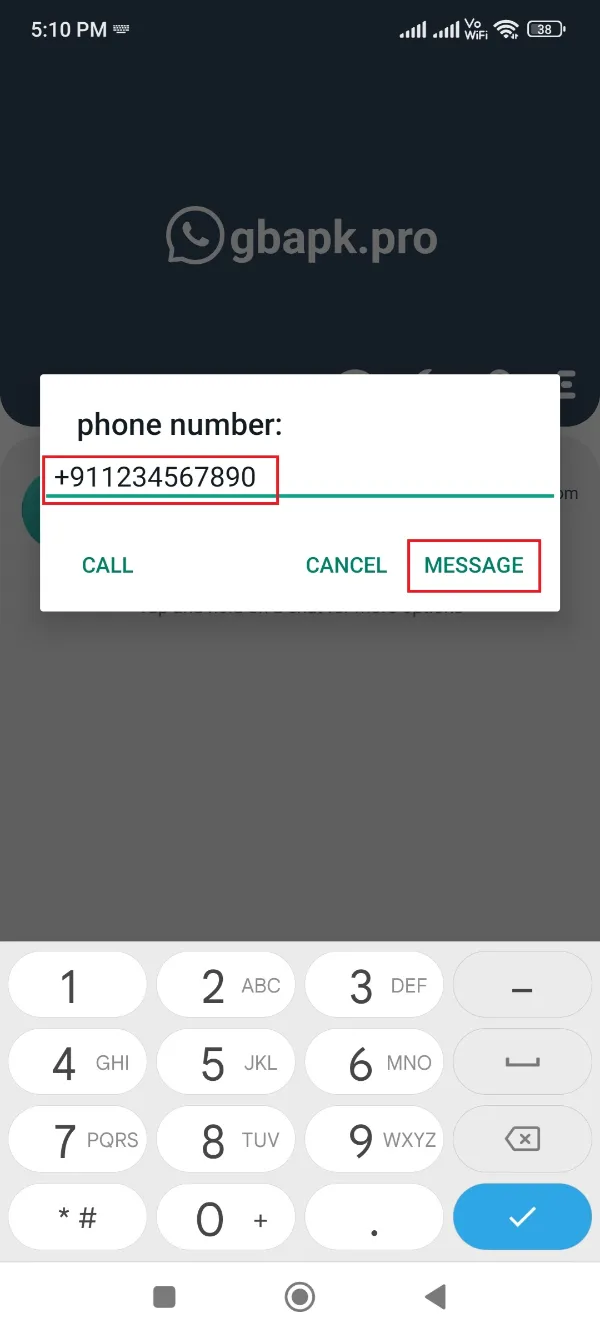
Just click the top-right cornered three-dot button of the GBWhatsApp Pro interface and select the Message a Number tab.
Now, fill in the number with the country code where you need to deliver your message, and GBWhatsApp Pro would naturally open the messaging window for that contact. You can also save that contact more simply now by following the below steps.
- Make the above procedure and open the Message a Number window.
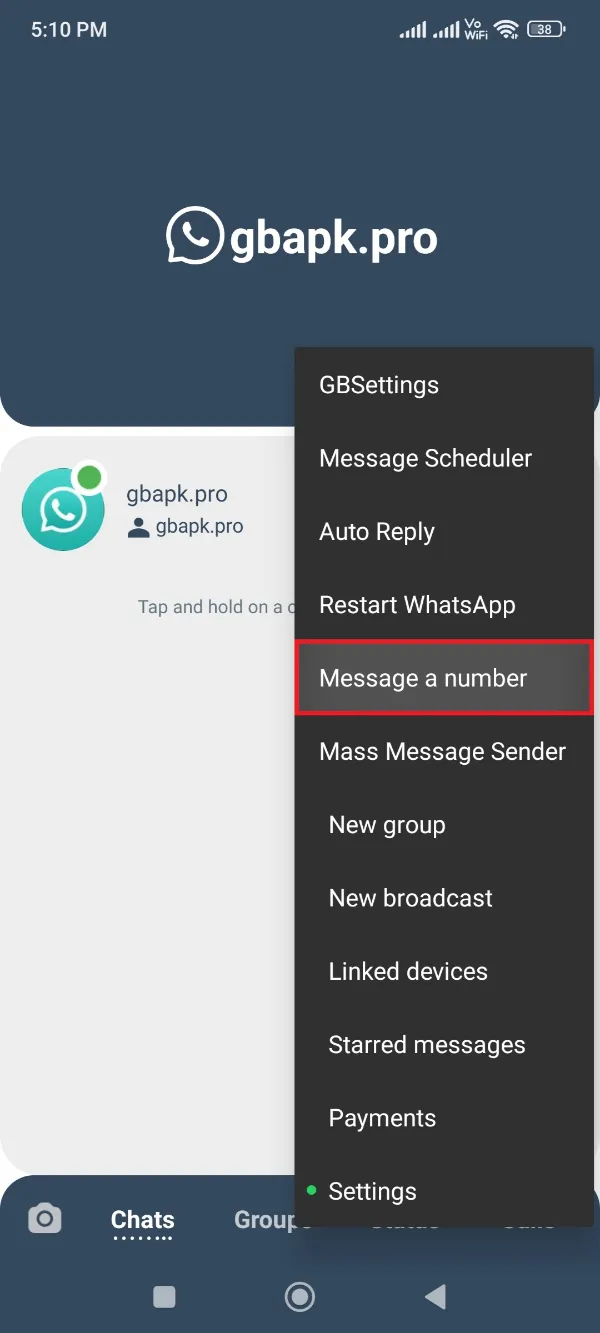
- Inscribe to the number that you heard and click Message button.
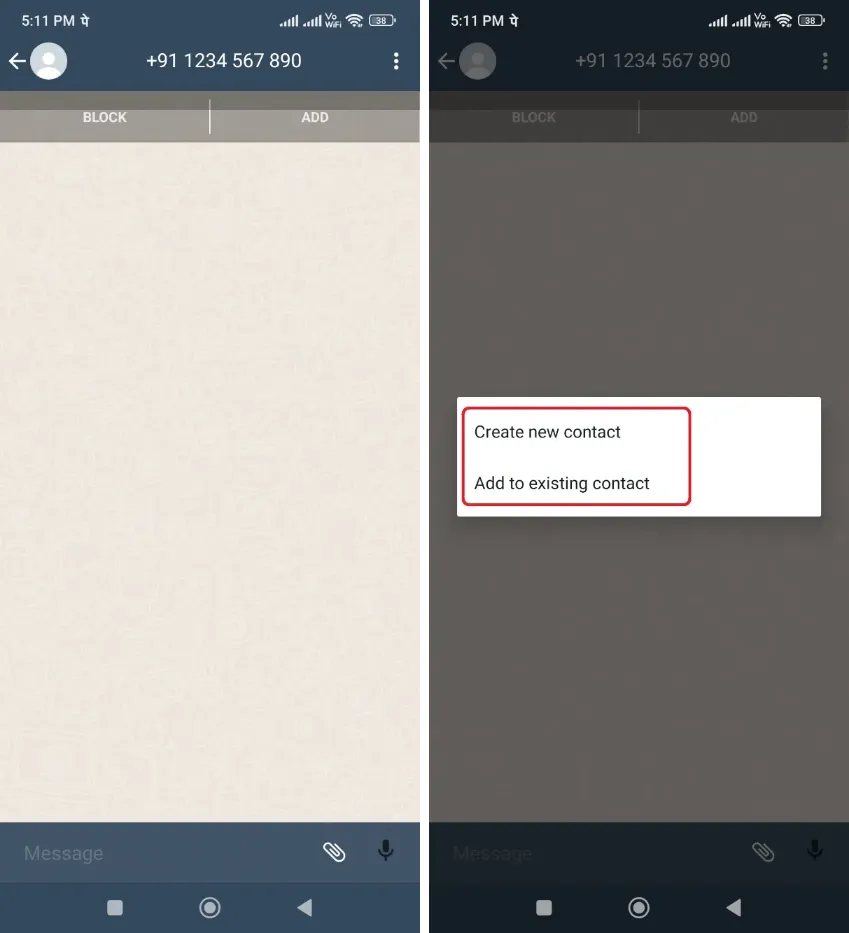
- Ultimately, click the Add button listed below that number on the messaging interface.
- Click Create New Contact or Add to Existing Contact as per the suitable option for that moment.
- Now you just need to fill in the First Name and Last Name of that contact.
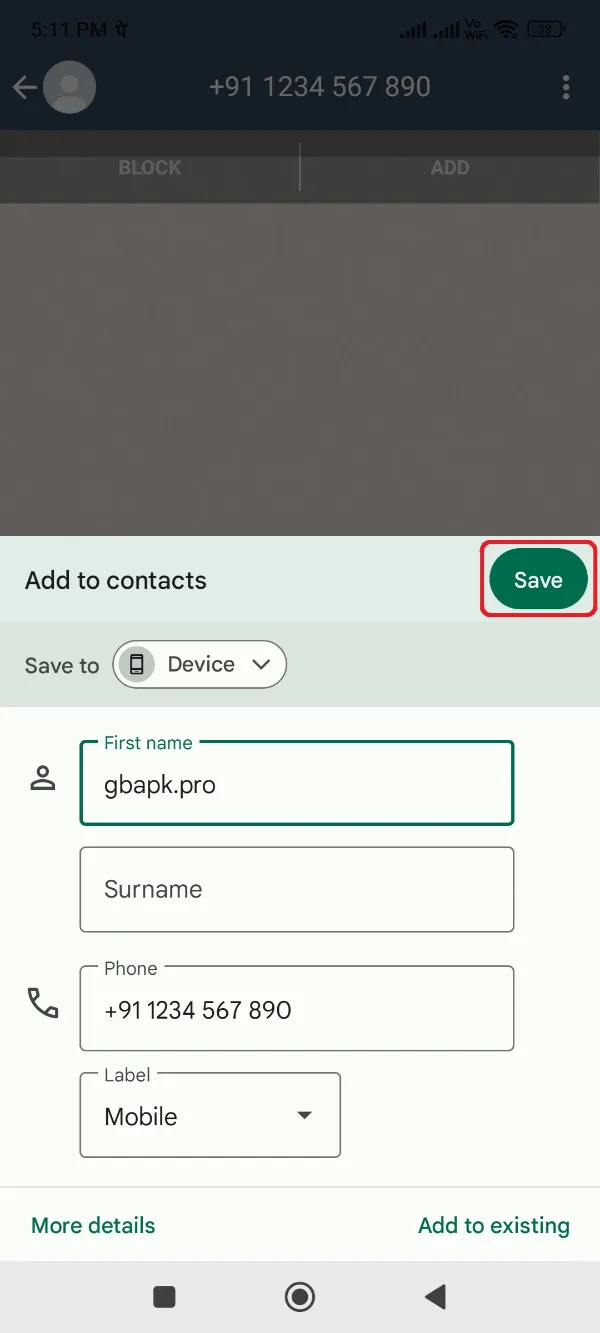
- Finally, click the Save button!